
Common Video Editing Errors and How to Avoid Them

Common Video Editing Errors and How to Avoid Them Video editing is a very important part of creating compelling and professional-grade content. Despite the expertise of editors, mistakes can still be made that influence the final product. As a beginner or professional editor, it is important to understand these common errors and how to avoid them in order to take your video production to the next level. ## 1. Overlooking Proper Storytelling Structure ### Error: Most editors are concerned with only glitzy transitions and effects and pay no attention to the flow of the story, resulting in disorienting or boring content. ### How to Avoid It: – Develop your video’s script prior to editing. – Apply a linear structure with a well-defined start, middle, and end. – Use a rational sequence to hold the audience’s attention. ## 2. Too Many Transitions and Effects ### Error: Overreliance on transitions, animations, or effects can make a video appear amateurish and distracting. ### How to Avoid It: – Apply simple fades or cuts for seamless transitions. – Remain with minimal and meaningful effects that support the content. – Do not use unnecessary movement or gimmicky transitions except when they support the story. ## 3. Poor Audio Quality ### Mistake: Overlooking background noise, variable audio levels, or applying poor-quality audio will destroy the viewing experience. ### How to Avoid It: – Record using high-quality microphones. – Normalize audio levels for consistency. – Cut background noise and apply suitable sound effects or music to the video. ## 4. Unstable Color Grading ### Error: Unbalanced or extreme color grading may result in a video that does not appear balanced and professional. ### How to Avoid It: – Apply even color correction to all the clips. – Utilize color grading to create the proper mood but keep it subtle. – Utilize color-matching tools for maintaining visual balance. ## 5. Poor Timing and Pacing ### Error: Dragging scenes out too long or cutting too quickly can make videos seem dull or frantic. ### How to Avoid It: – Make the video interesting by having a good rhythm. – Strategically use cuts that complement the energy and message of the video. – Review the video several times to make sure the pacing is smooth. ## 6. Forgetting to Place Text and Graphics ### Mistake: Positioning text, subtitles, or graphics near the edges or in an illegible font may impact readability. ### How to Avoid It: – Utilize legible fonts and suitable text sizes. – Maintain text placement in safe zones. – Keep text and graphics harmonious with the visuals without dominating them. ## 7. Omitting Optimization for Multiple Platforms ### Error: Video editing without regard to platform requirements may result in suboptimal playback or trimmed visuals. ### How to Prevent It: – Adapt resolutions and aspect ratios according to platform demands (e.g., 16:9 for YouTube, 9:16 for Reel). – Render videos in high-quality formats for various devices. – Preview videos on several screens prior to publication. ## Conclusion Steering clear of these typical video editing errors can greatly improve the quality of your videos. By prioritizing storytelling, audio clarity, color consistency, pacing, and platform optimization, you can produce professional and engaging content. Practice regularly, keep yourself informed about new techniques, and always check your work before publishing. Happy editing!  

Common Video Editing Errors and How to Avoid Them Read More »
How to Create a Stunning Logo: A Step-by-Step Guide

How to Create a Stunning Logo: A Step-by-Step Guide A well-crafted logo is essential for establishing a brand’s identity. It symbolizes the business, reflects its values, and leaves a memorable impression on customers. Whether you’re creating a logo for your own venture or for a client, this step-by-step guide will assist you in designing a remarkable and professional logo. ## Step 1: Understand the Brand Before diving into the design process, it’s important to thoroughly understand the brand. Consider these questions: – What services or products does the business offer? – What are its fundamental values? – Who is the intended audience? – What message should the logo communicate? An effective logo should resonate with the brand’s character and mission. ## Step 2: Research & Gather Inspiration Examine logos from competitors to grasp industry trends and discover what resonates well. Draw inspiration from design platforms such as: – **Dribbble** – **Behance** – **Pinterest** – **Instagram** Studying successful logos can spark ideas for your own design. ## Step 3: Choose the Right Design Style There are various logo styles, and the right choice hinges on the brand’s identity. Some popular styles include: – **Minimalist** – Simple and clean (e.g., Apple, Nike) – **Vintage** – Classic and nostalgic (e.g., Harley-Davidson) – **Modern** – Sleek and contemporary (e.g., Airbnb) – **Handwritten** – Friendly and personal (e.g., Coca-Cola) Selecting a style that reflects the brand ensures a unified visual identity. ## Step 4: Select the Right Colors & Typography ### Colors: Colors can evoke specific emotions and associations, so choose wisely. For instance: – **Red** – Excitement, passion, energy – **Blue** – Trust, professionalism, calmness – **Yellow** – Optimism, creativity, friendliness – **Green** – Growth, health, sustainability ### Typography: Fonts also play a significant role in shaping brand perception. Some options include: – **Serif fonts** – Classic and formal (e.g., Times New Roman) – **Sans-serif fonts** – Modern and clean (e.g., Helvetica)

How to Create a Stunning Logo: A Step-by-Step Guide Read More »

A Beginner’s Guide to Graphic Design: Essential Tools & Skills

A Beginner’s Guide to Graphic Design: Essential Tools & Skills Graphic design is a vibrant and creative field that merges art with technology to visually communicate ideas. Whether you aim to be a professional designer or simply want to craft appealing visuals, learning the right tools and skills is crucial. This guide will introduce you to the basics of graphic design, the essential tools, and the key skills you need to begin your journey. Understanding Graphic Design At its core, graphic design focuses on visual communication. It involves creating designs for various formats, both digital and print, utilizing typography, color, images, and layout techniques. The objective is to convey messages in a way that is both effective and visually pleasing. Essential Tools for Graphic Designers To produce high-quality designs, having the right tools is necessary. Here are some of the most widely used graphic design tools today: 1. **Design Software** – **Adobe Photoshop** – Perfect for image editing, digital painting, and graphic manipulation. – **Adobe Illustrator** – Ideal for creating vector graphics, logos, and illustrations. – **Adobe InDesign** – Used for page layout and print design. – **Canva** – A user-friendly tool for social media graphics and presentations. – **Figma** – A collaborative UI/UX design tool for web and app design. 2. **Hardware Requirements** – A powerful computer with a high-resolution display. – A graphics tablet (like a Wacom) for digital drawing. – A color-accurate monitor to ensure precise color representation. 3. **Stock Resources & Fonts** – Websites such as **Unsplash**, **Pexels**, and **Freepik** provide free stock images. – **Google Fonts** and **Adobe Fonts** offer a wide variety of typefaces. Essential Skills for Graphic Designers To become a skilled graphic designer, you need to master several key skills. Here are some of the most vital ones: 1. **Typography Mastery** Knowing how to select and pair fonts is crucial for creating readable and engaging designs.

A Beginner’s Guide to Graphic Design: Essential Tools & Skills Read More »

Applying AI to Prompt Engineering

Applying AI to Prompt Engineering: Realizing the Full Potential of Generative Models Artificial Intelligence (AI) has transformed the manner in which we communicate with machines, particularly with the advent of generative models such as ChatGPT, DALL·E, and others. Yet, to get the best out of these AI models, users need to learn the art of prompt engineering. Through the use of AI itself in this endeavor, we can improve our prompts, maximize responses, and tap into unprecedented levels of creativity and efficiency. What is Prompt Engineering? Prompt engineering is the process of designing good and efficient prompts to get the desired output from AI models. Because AI response relies so heavily on what’s input, a well-designed prompt can greatly enhance accuracy, relevance, and coherence. The Role of AI in Prompt Engineering AI itself can be an influential ally in optimizing prompt design. Here’s why: Automated Prompt Optimization AI tools have the ability to read user input and provide enhanced prompts based on past performance and best practices. AI tools are able to fine-tune prompts by rewording sentences, adding context, or rewording for readability. Adaptive Learning for Enhanced Prompts Machine learning models are able to learn how people interact with AI and incrementally offer improved versions of prompts. AI can monitor which prompts get the best responses and suggest modifications. Testing and Iteration AI-driven platforms can conduct A/B testing on different prompt variations to determine which one produces the most optimal responses, helping users develop better interactions over time. Contextual Enhancement By leveraging AI’s ability to analyze vast datasets, it can provide contextual insights that help structure more effective prompts. For instance, AI can suggest adding specific keywords or phrases to improve response accuracy. Multi-Modal Prompting AI is now more commonly being applied to fine-tune prompts of different types of media, like text-to-image and code-to-text generation. This will guarantee that the prompts are highly optimized irrespective of the AI model that is used. Best Practices for AI-Powered Prompt Engineering To derive maximum advantage out of AI prompt engineering, apply the following best practices: Be Specific: Generic results are delivered by vague prompts. Clearly articulate your purpose and offer required specifics. Use Examples: Showing the intended style of output assists AI models in producing more appropriate responses. Iterate and Experiment: Employ AI-powered tools to improve and experiment with varied prompts to find out what works best. Leverage AI Feedback: Make use of AI-powered feedback systems that provide recommendations for alterations to prompts in real time. Know Model Limitations: AI possesses limitations; writing prompts within such limitations guarantees optimal outcomes. Future of AI in Prompt Engineering With the accelerated development of AI, we can anticipate increasingly advanced tools that automatically create high-quality prompts. AI-powered interfaces will probably become even more sophisticated and offer real-time suggestions as well as help users build prompts with little or no manual intervention. The combination of AI and prompt engineering is transforming the future of human-machine interaction. Through the use of AI to optimize and improve prompt design, we are able to drastically improve how we engage with generative models—opening up new horizons in creativity, productivity, and innovation.

Applying AI to Prompt Engineering Read More »

Here’s a comprehensive guide to get you started with full-stack development using PHP and JavaScript:

Here’s a comprehensive guide to get you started with full-stack development using PHP and JavaScript: What is Full-Stack Development? Full-stack development refers to the practice of handling all layers of a web application, from the front-end (client-side) to the back-end (server-side). Why Choose PHP and JavaScript? PHP is a popular server-side scripting language, while JavaScript is a versatile client-side scripting language. Together, they form a powerful combination for full-stack development. Setting Up Your Development Environment 1. Install a code editor or IDE (Integrated Development Environment) like Visual Studio Code, Sublime Text, or PHPStorm. 2. Set up a local development server using XAMPP, MAMP, or WAMP. 3. Install Node.js and npm (Node Package Manager) for JavaScript development. Front-end Development with JavaScript 1. Learn the basics of JavaScript, including variables, data types, functions, and object-oriented programming. 2. Familiarize yourself with popular front-end frameworks like React, Angular, or Vue.js. 3. Use libraries like jQuery for DOM manipulation and Axius for HTTP requests. Back-end Development with PHP 1. Learn the basics of PHP, including variables, data types, functions, and object-oriented programming. 2. Understand how to work with databases using PHP and MySQL. 3. Familiarize yourself with popular PHP frameworks like Laravel, CodeIgniter, or Symphony. *Connecting Front-end and Back-end* 1. Learn about RESTful APIs (Application Programming Interfaces) and how to create them using PHP. 2. Understand how to consume APIs using JavaScript and libraries like Axius. 3. Implement authentication and authorization mechanisms to secure your application. *Best Practices and Tools* 1. Follow coding standards and best practices for PHP and JavaScript. 2. Use version control systems like Git for collaborative development. 3. Utilize debugging tools like Chrome DevTools for front-end and Xdebug for back-end. 4. Implement testing frameworks like Jest for JavaScript and PHPUnit for PHP. Real-World Projects and Examples 1. Build a simple blog or CMS (Content Management System) using PHP and MySQL. 2. Create a RESTful API using PHP and consume it using JavaScript. 3. Develop a single-page application (SPA) using React, Angular, or Vue.js. Conclusion Full-stack development with PHP and JavaScript requires dedication and practice. Focus on building real-world projects, and you’ll become proficient in no time. Additional Resources 1. PHP Documentation: (link unavailable) 2. JavaScript Documentation: (link unavailable) 3. Laravel Documentation: (link unavailable) 4. React Documentation: (link unavailable)

Here’s a comprehensive guide to get you started with full-stack development using PHP and JavaScript: Read More »

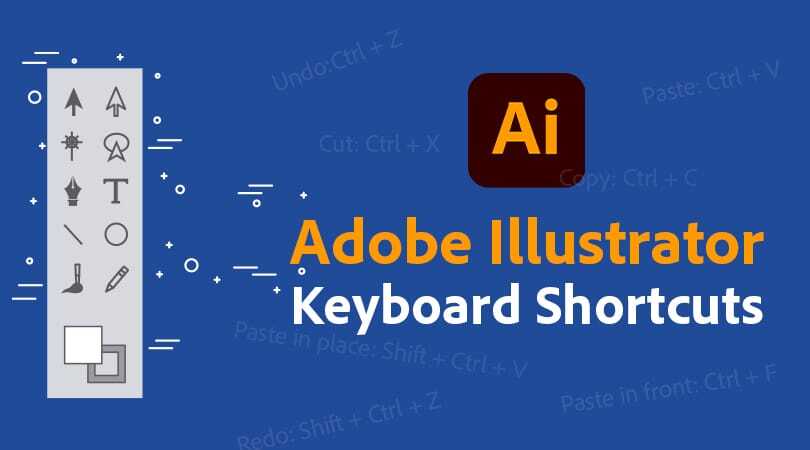
Must-Know Adobe Illustrator Shortcuts for All Designers

Must-Know Adobe Illustrator Shortcuts for All Designers: Adobe Illustrator is a mighty design tool with unlimited potential for crafting amazing vector graphics. Still, it’s not all about mastering the tools; it’s also about utilizing them more quickly. Shortcuts can significantly streamline your workflow, allowing you to work smarter, rather than harder. Below are some must-know Adobe Illustrator shortcuts for all designers. 1. Selection & Navigation Shortcuts – V – Selection Tool: Rapidly select and move objects. – A – Direct Selection Tool: Select and edit anchor points and paths. – Spacebar – Hand Tool: Pan around your canvas with ease. – Ctrl + Spacebar (Cmd + Spacebar on Mac) – Zoom In: Rapidly zoom in on details. – Alt + Spacebar (Option + Spacebar on Mac) – Zoom Out: Zoom out to view the larger picture. 2. Shape & Object Manipulation – M – Rectangle Tool: Create rectangles and squares instantly. – L – Ellipse Tool: Draw circles and ovals with ease. – Shift + Drag – Constrain Proportions: Keep the aspect ratio of shapes when resizing. – Alt + Drag (Option + Drag on Mac) – Duplicate Object: Duplicate an object in a snap. – Ctrl + D (Cmd + D on Mac) – Transform Again: Redo the previous transformation, ideal for creating patterns. 3. Text & Type Tool Shortcuts – T – Type Tool: Click and type anywhere on the canvas. – Ctrl + Shift + O (Cmd + Shift + O on Mac) – Create Outlines: Turn text into editable vector shapes. – Ctrl + Shift + B (Cmd + Shift + B on Mac) – Hide/Show Bounding Box: Toggle bounding box visibility for improved text alignment. – Ctrl + Shift + >/< (Cmd + Shift + >/< on Mac) – Increase/Decrease Font Size: Resize text without going through the menu. 4. Layer & Grouping Commands – *Ctrl + G (Cmd + G on Mac)* – Group Objects: Group multiple objects together. – Ctrl + Shift + G (Cmd + Shift + G on Mac) – Ungroup Objects: Break grouped objects apart. – Ctrl + [ or ] (Cmd + [ or ] on Mac) – Send Backward/Bring Forward: Rearrange the layering order of objects. – Ctrl + Shift + [ or ] (Cmd + Shift + [ or ] on Mac) – Send to Back/Bring to Front: Put objects straight on top or at the bottom layer. 5. Pathfinder & Alignment Shortcuts – Shift + Ctrl + F9 (Shift + Cmd + F9 on Mac) – Open Pathfinder Panel: Quickly open path merging tools. – Shift + Ctrl + ] (Shift + Cmd + ] on Mac) – Align to Artboard: Center objects on the canvas. Ctrl + Alt + Shift + J (Cmd + Option + Shift + J on Mac) – Justify Paragraph Text: Maintain text alignment consistency. Boost Your Efficiency Memorizing these shortcuts may take time, but once they become second nature, your design process will be faster and smoother. Try incorporating a few at a time into your workflow, and soon, you’ll be designing with speed and precision. Happy designing!

Must-Know Adobe Illustrator Shortcuts for All Designers Read More »

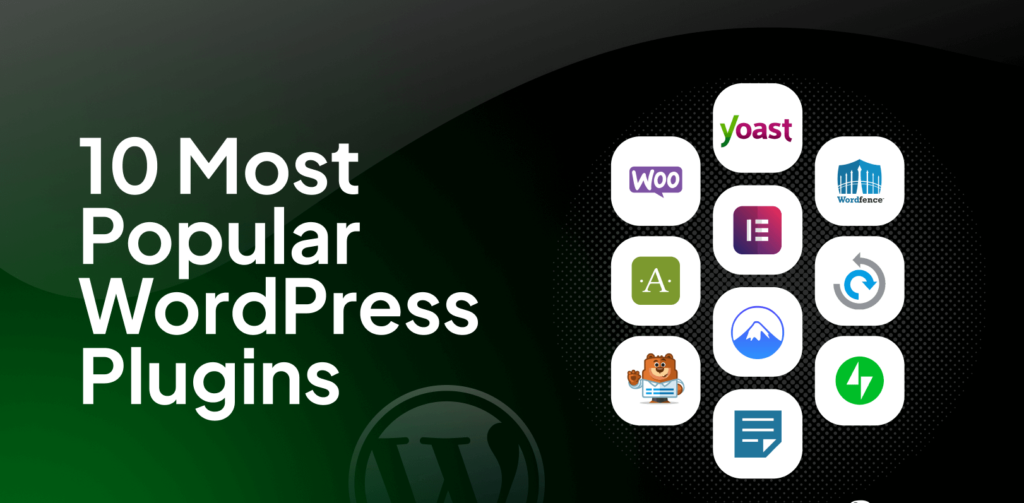
10 Useful Free Plugins in WordPress Elementor

10 Useful Free Plugins in WordPress Elementor Elementor is one of the most popular page builders for WordPress, offering a drag-and-drop interface that makes website design a breeze. To enhance its functionality, there are numerous free plugins available. Here are 10 useful free plugins that can take your Elementor experience to the next level: These plugins can significantly enhance your Elementor experience, offering more design flexibility and functionality without breaking the bank. Give them a try and see how they can transform your WordPress website!

10 Useful Free Plugins in WordPress Elementor Read More »

10 Useful HTML Tags Every Web Developer Should Know

10 Useful HTML Tags Every Web Developer Should Know HTML (Hypertext Markup Language) is the backbone of every website. It provides the structure and content of web pages, making it essential for web developers to master. Whether you’re a beginner or an experienced developer, knowing the most useful HTML tags can significantly improve your coding efficiency and the quality of your websites. In this blog, we’ll explore 10 useful HTML tags that are essential for creating well-structured, SEO-friendly, and accessible web pages. 1. <title> Tag The <title> tag is one of the most important tags for SEO. It defines the title of the webpage, which appears in the browser tab and search engine results. A well-optimized title tag can improve your website’s click-through rate (CTR) and search engine ranking. Example: <title>10 Useful HTML Tags for Web Developers | YourWebsite.com</title> SEO Tip: Include relevant keywords in the title tag and keep it under 60 characters to ensure it displays properly in search results. 2. <meta> Tag The <meta> tag is used to provide metadata about the webpage, such as descriptions and keywords. The most commonly used meta tags are description and viewport. Example: <meta name=”description” content=”Discover 10 useful HTML tags every web developer should know. Learn how to use these tags to create SEO-friendly and accessible websites.”> <meta name=”viewport” content=”width=device-width, initial-scale=1.0″> SEO Tip: Write a compelling meta description (under 160 characters) to encourage users to click on your link in search results. 3. <header> Tag The <header> tag defines the header section of a webpage or a section within the page. It typically contains the website logo, navigation menu, and introductory content. Example: <header> <h1>Welcome to My Website</h1> <nav> <a href=”/”>Home</a> <a href=”/about”>About</a> </nav> </header> SEO Tip: Use the <header> tag to structure your content logically, which helps search engines understand your page layout. 4. <main> Tag The <main> tag represents the main content of a webpage. It should contain unique content that is directly related to the page’s purpose. Example: <main> <h2>10 Useful HTML Tags</h2> <p>Here are 10 HTML tags that every web developer should know…</p> </main> SEO Tip: Avoid placing repetitive content (like navigation links) inside the <main> tag to improve SEO. 5. <article> Tag The <article> tag is used to define self-contained content that can be distributed independently, such as blog posts, news articles, or forum posts. Example: <article> <h2>How to Use the Article Tag</h2> <p>The article tag is perfect for blog posts and news articles…</p> </article> SEO Tip: Use the <article> tag to structure blog posts or news content, making it easier for search engines to identify and index your content. 6. <section> Tag The <section> tag is used to group related content together. It helps organize content into meaningful sections, improving readability and accessibility. Example: <section> <h2>HTML Tags for SEO</h2> <p>Learn how to use HTML tags to improve your website’s SEO…</p> </section> SEO Tip: Use headings (<h1> to <h6>) within sections to create a clear content hierarchy. 7. <img> Tag The <img> tag is used to embed images in a webpage. It’s essential to use the alt attribute for accessibility and SEO. Example: <img src=”html-tags.jpg” alt=”10 Useful HTML Tags for Web Developers”> SEO Tip: Always include descriptive alt text for images to improve accessibility and help search engines understand the content of the image. 8. <a> Tag The <a> tag is used to create hyperlinks, which are crucial for navigation and SEO. Example: <a href=”https://example.com/html-tags” title=”Learn HTML Tags”>Learn More About HTML Tags</a> SEO Tip: Use descriptive anchor text and include the title attribute for better user experience and SEO. 9. <footer> Tag The <footer> tag defines the footer section of a webpage, typically containing copyright information, contact details, and social media links. Example: <footer> <p>&copy; 2023 YourWebsite.com. All rights reserved.</p> </footer> SEO Tip: Use the <footer> tag to include important links and information, but avoid keyword stuffing. 10. <meta charset=”UTF-8″> Tag The <meta charset=”UTF-8″> tag specifies the character encoding for the webpage. It ensures that special characters and symbols are displayed correctly. Example: <meta charset=”UTF-8″> SEO Tip: Always include this tag in the <head> section to avoid rendering issues and improve website accessibility. Conclusion Mastering these 10 useful HTML tags will not only help you create well-structured and accessible websites but also improve your website’s SEO performance. By using tags like <title>, <meta>, <header>, and <img> correctly, you can enhance your website’s visibility in search engine results and provide a better user experience. Start implementing these tags in your projects today and take your web development skills to the next level!

10 Useful HTML Tags Every Web Developer Should Know Read More »

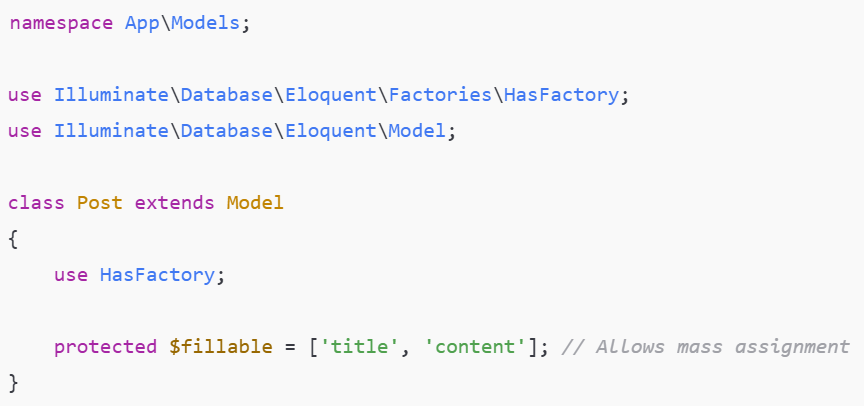
Eloquent ORM in Laravel: A Comprehensive Guide

Utilizing the object-oriented methodology, Eloquent ORM into Laravel provides a robust and intuitive database management solution that streamlines database interactions. Because every data base record has been represented through a model, developers can easily complete CRUD activities. Eloquent facilitates more effective data manipulation by supporting mutators, optimistic loading, acquaintances, and filter scopes. Additionally, it has features that improve security as well as flexibility, such as accessors along with soft deletes. Eloquent’s flexible syntax and integrated features enhance the accessibility of code and effectiveness, increasing the productivity and maintainability of Laravel development.

Eloquent ORM in Laravel: A Comprehensive Guide Read More »

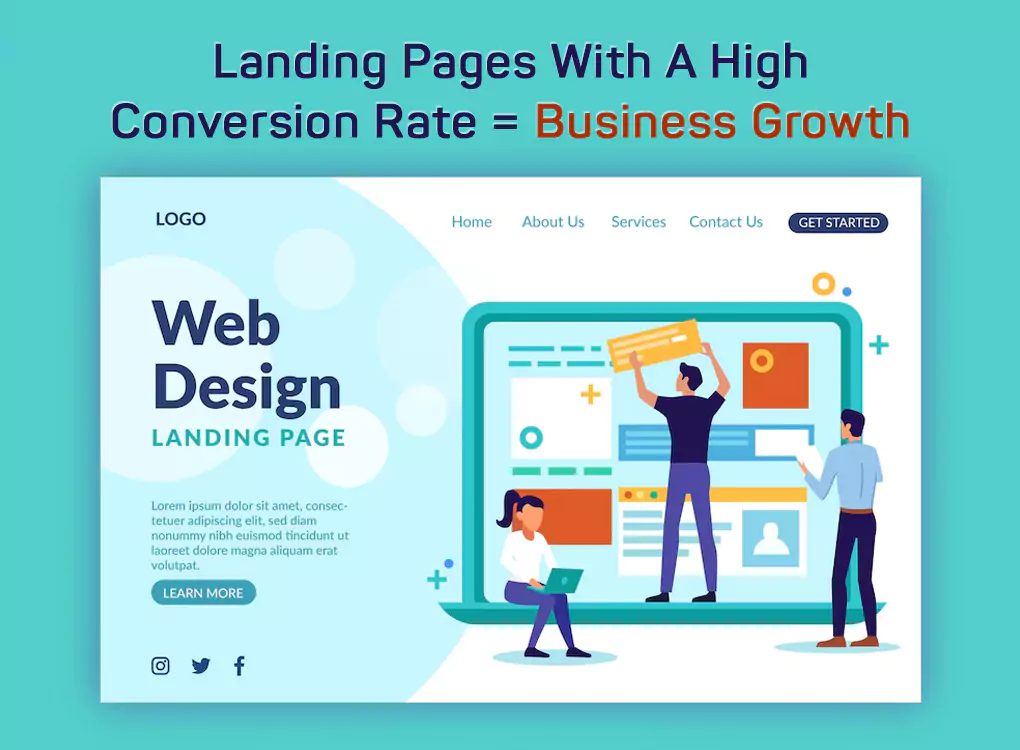
How to Create a High-Converting Landing Page

A landing page is the most critical aspect of any online marketing campaign. It acts as the initial interaction point between your brand and target customers. An effective landing page can drastically improve conversion rates; be it a lead generation page, selling something, or pitching a service. In this post, we’re going to talk about key factors that help create a high-converting landing page. 1. Define Your Goal Clearly Before you design your landing page, define the primary objective of it. Are you looking for newsletter subscribers, product purchases, or event registrations? You can properly frame the page and keep unnecessary elements away when you have a clear goal. 2. Craft a Compelling Headline Your headline is where the visitor first sees you, so it needs to be attention-grabbing at a glance. Keep it direct, concise, and benefit-driven. Your headline tells the reader the value of your offer in just a few words. 3. Use Engaging Visuals High-quality images or videos combined with graphic designs can make your landing page very appealing to the eye and drive your message home. Apply images that are relevant and follow the content so as not to distract from it. 4. Write Persuasive Copy The body text must be engaging and centered on the needs of the visitor. Talk about the benefits of your offer rather than the features. Use simple persuasive language and short paragraphs for easy reading. 5. Include a Strong Call-to-Action (CTA) Your CTA button is what makes the difference in conversions. Use action words such as “Get Started,” “Download Now,” or “Claim Your Free Trial.” A CTA needs to stand out on the page using a contrasting color and at an eye-level position. 6. Build Trust with Social Proof Adding testimonials, reviews, case studies, or trust badges can enhance credibility. Social proof reassures visitors that others have benefited from your product or service, increasing their likelihood of taking action. 7. Optimize for Mobile With a significant percentage of users browsing on mobile devices, your landing page must be fully responsive. Ensure that all elements adjust properly on smaller screens and that the CTA remains easily accessible. 8. Minimize Distractions A clean and focused landing page should be high converting. Eliminate unnecessary navigation menus and extra links that might pull visitors away from your CTA. The less distraction, the higher the chance of conversion. 9. Use A/B Testing No landing page is perfect at first. A/B testing different elements, such as headlines, CTA buttons, colors, or images, can help you determine what works best. Continuous optimization based on data insights will improve conversion rates over time. 10. Optimize Loading Speed Slow-loading pages can increase bounce rates. Optimize your images, use a reliable hosting provider, and minimize unnecessary scripts to ensure your landing page loads quickly. Final Thoughts A high-converting landing page requires a strategic approach. With clarity, compelling content, trust-building elements, and optimization, you can design a page that really engages your visitors and pushes them to action. Test, refine, and continually improve your landing page to maximize conversions and reach your business goals.

How to Create a High-Converting Landing Page Read More »

Scroll to Top